It can be incredibly useful if you will have a local installation of WordPress on your computer for testing, development and modify. If you want to test new releases of WordPress or themes, plugins and any code updates, many WordPress developers and even website owners install WordPress locally on their computers, before using them in production.
On the internet you can find different information on how to install WordPress locally, but in this article, we want to show you how you can use a free application called XAMPP in order to create a local WordPress environment.
The reasons you should install WordPress on your computer?
You might be asking why anybody would install WordPress on their PC. All things considered, could it not be faster to simply install on your live site and save yourself time? Making any updates directly on your live WordPress website will indeed save you time initially, but experienced WordPress user will avoid to make serious updates on live website, it could be so risky. Many websites have been crashed when the users have upgrading to a new version of WordPress, or updating the theme or a plugin.
A broken website is also affecting his users, and the time spend to resurrect the website could be much longer than it will take to install and test all updates or changes on your computer.
Few reasons why the users or developers use a local version of the WordPress on their computer are:
- For Testing: Used to safely test upgrades of themes, plugins and even new versions of WordPress;
- Development: Used to modify WordPress themes and plugins;
- The speed: Locally installed WordPress website run much quicker than their online versions;
- Website Staging: An WordPress staging site can be installed on your local WordPress website and used properly. After you have complete all modifications you need, they can be pushed to your live website.
There are many benefits having a WordPress installed on your local computer. Setting one up is an easier process that any user can make it.
Now that we’ve looked at the reasons why WordPress should be installed locally on your computer, let’s see how we can do this.
Do you know what is XAMPP?
XAMPP is a free and open-source cross-platform web server solution stack package developed by Apache Friends. The name “XAMPP” is an acronym that stands for:
- X: Cross-platform (available for multiple operating systems)
- A: Apache HTTP Server (a popular open-source web server software)
- M: MySQL (a relational database management system, now commonly replaced with MariaDB)
- P: PHP (a server-side scripting language used for web development)
- P: Perl (another scripting language, though less commonly used in web development)
XAMPP is designed to make it easy to set up a local web server environment on your computer, which includes all the necessary components for running dynamic web applications and websites. It is particularly popular among developers for creating and testing web applications offline before deploying them to a live server.
XAMPP provides a simple graphical user interface (GUI) control panel that allows users to start and stop the Apache server, MySQL database server, and other included services with just a few clicks. It’s available for Windows, macOS, and Linux, making it a versatile tool for web development regardless of your operating system.
Overall, XAMPP is a convenient solution for setting up a local development environment quickly and easily, making it a popular choice among developers and hobbyists alike.
According to official WordPress Website page, to run WordPress is recommended the host to support:
- PHP version 7.4 or greater;
- MySQL version 8.0 or greater OR MariaDB version 10.4 or greater;
- Nginx or Apache with mod_rewrite module;
- HTTPS support.
These open-source applications can be easy installed separately on your computer, but, the XAMPP will install all it’s need to run WordPress on your computer, and the XAMPP is not used only for WordPress but can be used to install localy Joomla, Drupal, PrestaShop and OpenCart.
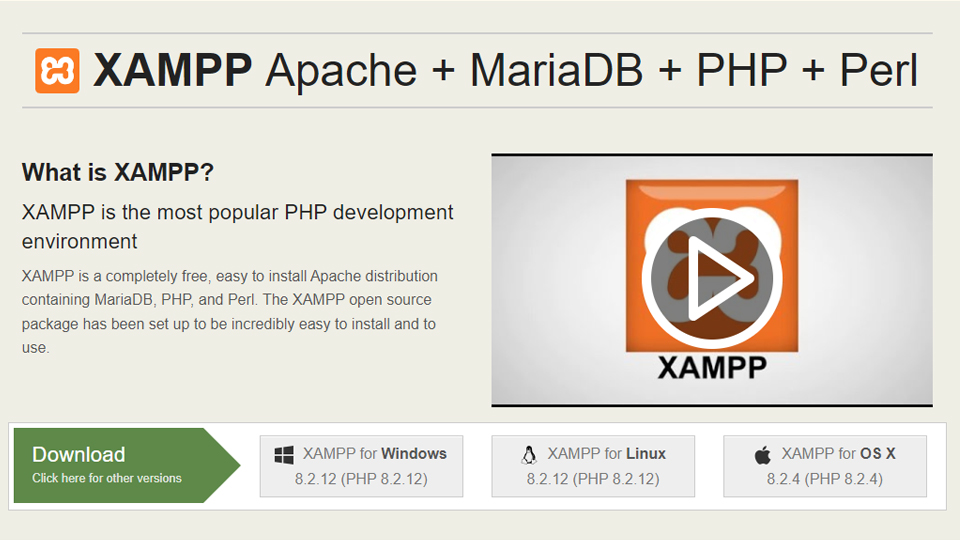
The XAMPP can be used from a different operating systems as Windows, Linux or OS X. How it’s represent on the image above, the name XAMPP is from X – multiple operating systems; A – Apache; M – MariaDB; P – PHP; P – Perl, and all these four applications installed on an operating system open many posibilities for developers and owners of the websites.
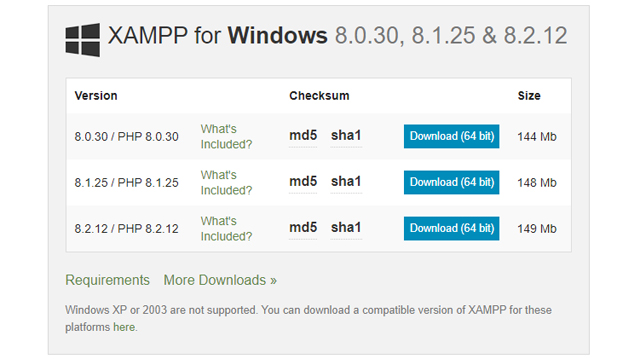
You can download XAMPP with different versions of PHP for each operating system. It comes with an add-on, but about this we will speak later in this article.
For this tutorial we will install the 8.2.12/PHP 8.2.12 version of XAMPP on a computer with Windows operating system. If you have another operating system, the process is the same, but the layout of the control panel may varies on each operating system.
How to install and use XAMPP on your computer
The installation process should start with downloading the XAMPP version that fits your needs (WordPress version, theme compatibility), then double click the .exe file. If you need the same version as we used in this tutorial, you can download the XAMPP clicking here.
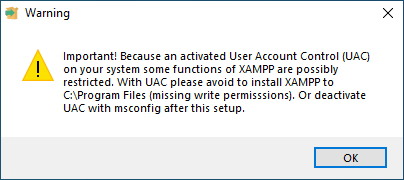
After clicking the .exe file that you have downloaded, Windows will pop up a Warning message, that indicates Important note about how and where you should install the XAMPP in order to have full functions access of the XAMPP, and the actions you should take it in order to install the app into the C:\ drive of your computer.
In the following gallery you will see the screenshots from the XAMPP installation steps:
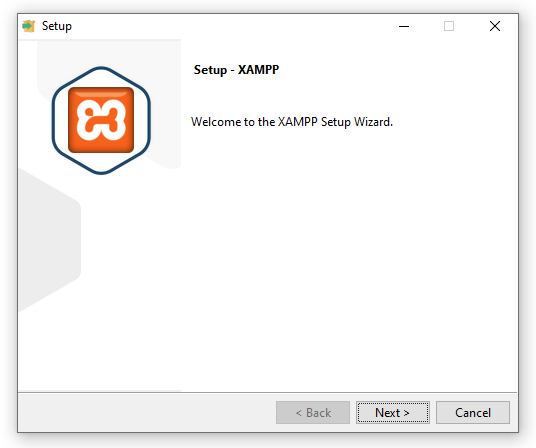
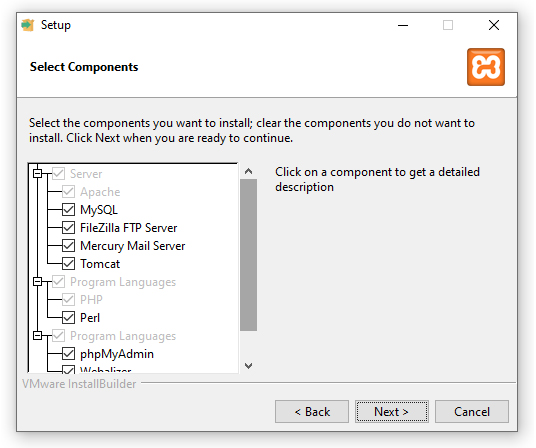
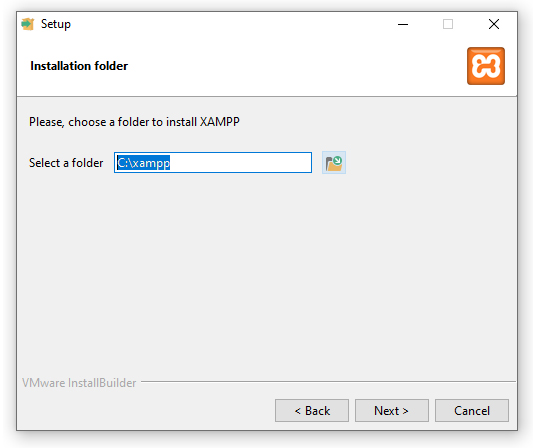
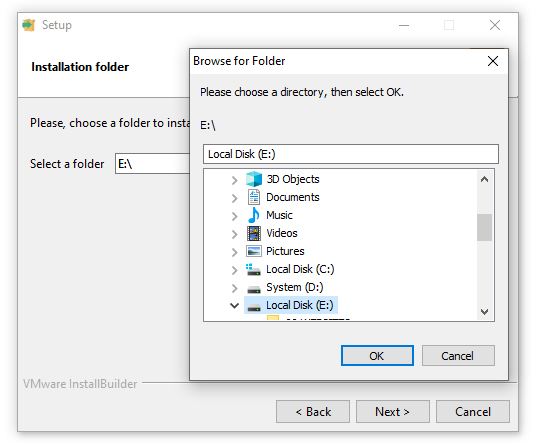
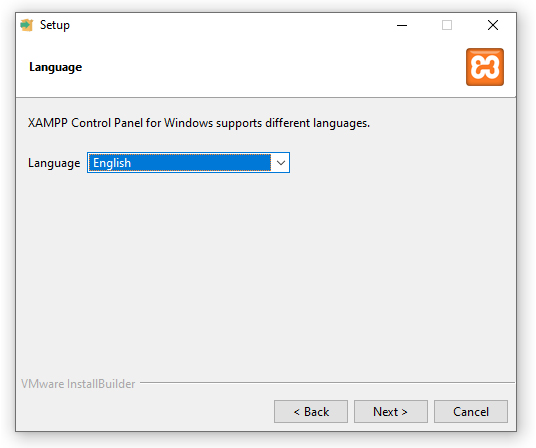
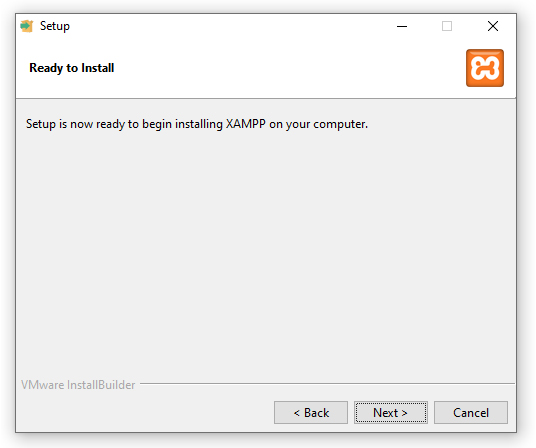
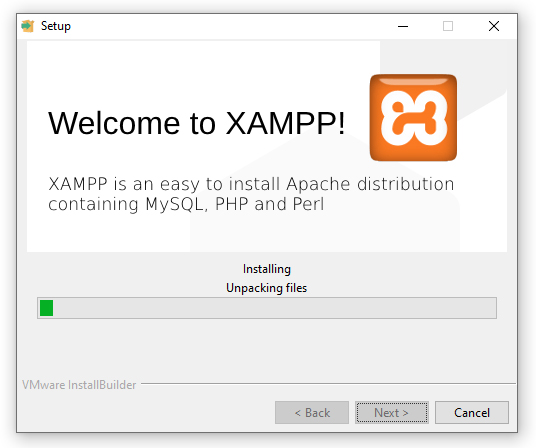
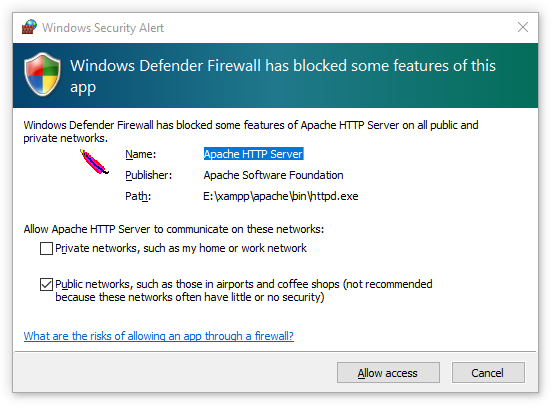
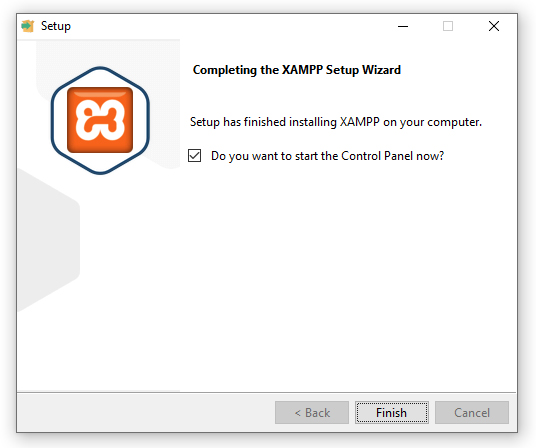
You need to remember the folder where you have select to install the XAMPP app, later we will use that location to install our WordPress website.
Congratulations! You have installed the XAMPP on your computer, now you can start the Control Panel were you will see the available settings.
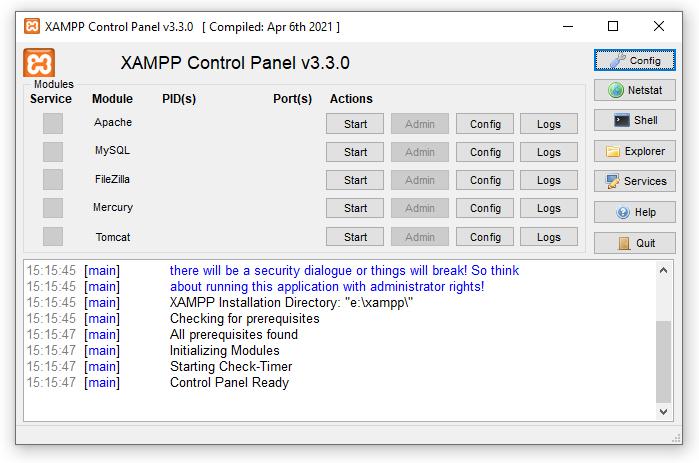
What do you see above is the Control Panel of the fresh installed XAMPP app on you computer, but this is not all. If we want to install the WordPress on our computer we need to activate some services from the XMAPP Control Panel. These services are: Apache and MySQL, and their activation is very simple, we just need to click on start button for the services we need to be active.
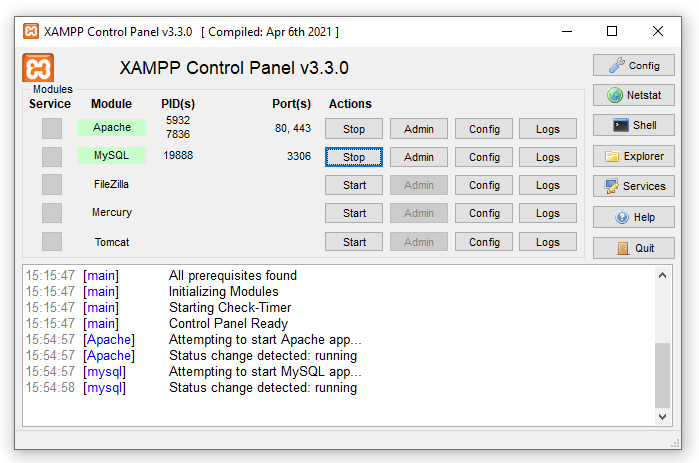
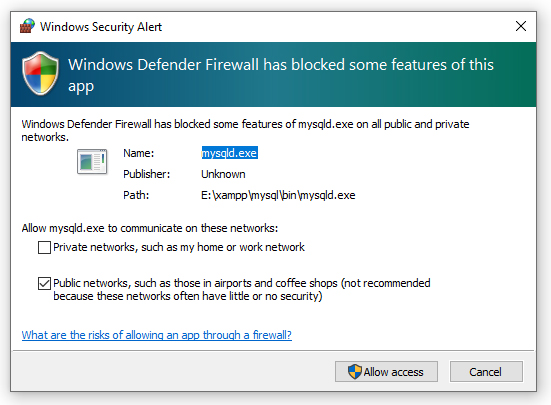
After starting the MySQL service, Windows Security Alert will pop up with the following message:
Now we need to check if the services are running on our computer, we just need to open our browser and access the following address: http://localhost/dashboard/index.html or just write localhost and hit Enter button.
If the services are running correctly then you should see on your browser the following page:
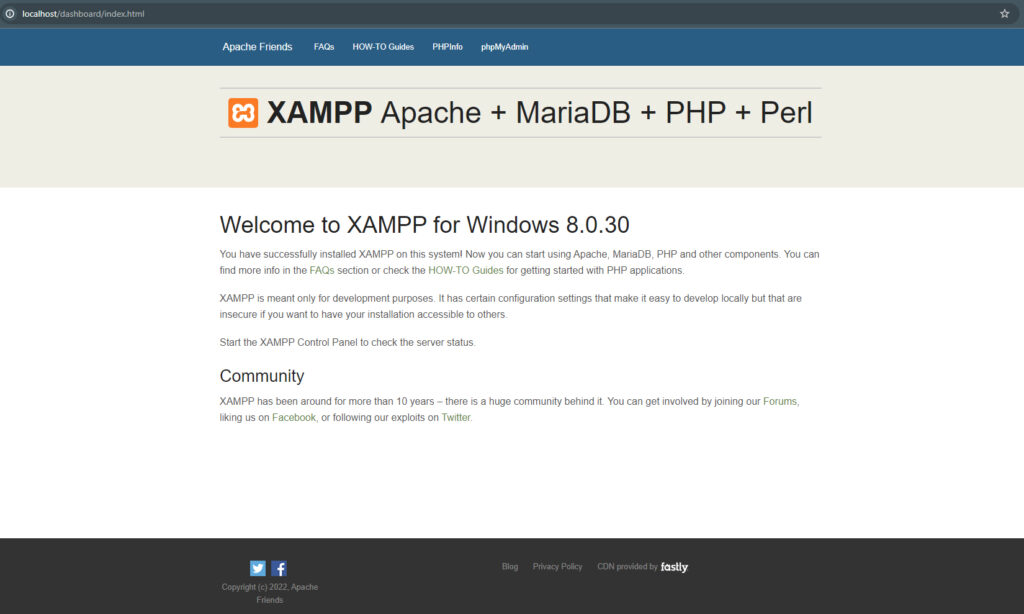
Here you will find some information about the Apache, MySQL and PHP services, also from the phpMyAdmin page you can access the MySQL interface that we will use latter to create our Database for WordPress website.
Installing the WordPress
We are almost at the end, have some more steps to do and we will have the WordPress installed on our computer.
The next things we need to have is the WordPress itself (all the files) and the database tables where the website settings will be stored.
Creating a database
In order to create a database, we need to have running the XAMPP app and modules Apache and MySQL. After, we have activated those modules, we need to access the phpMyAdmin page accessing via our browser the following URL: http://localhost/phpmyadmin/.
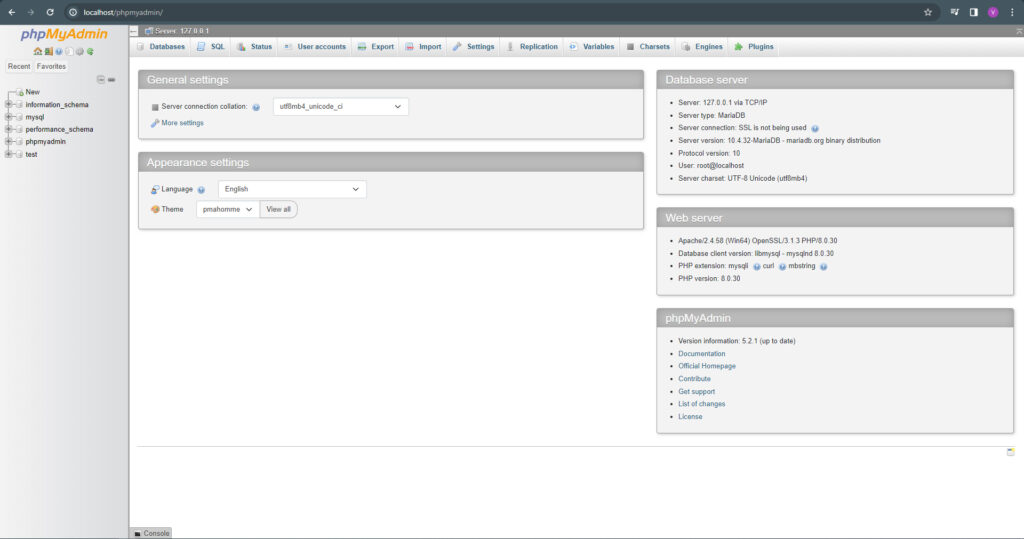
In this post we will not cover all the phpMyAdmin console, we will stop just to the main actions we need to install our WordPress website.
To create a database we need to click on the New button from the left menu, and you will see the following image:
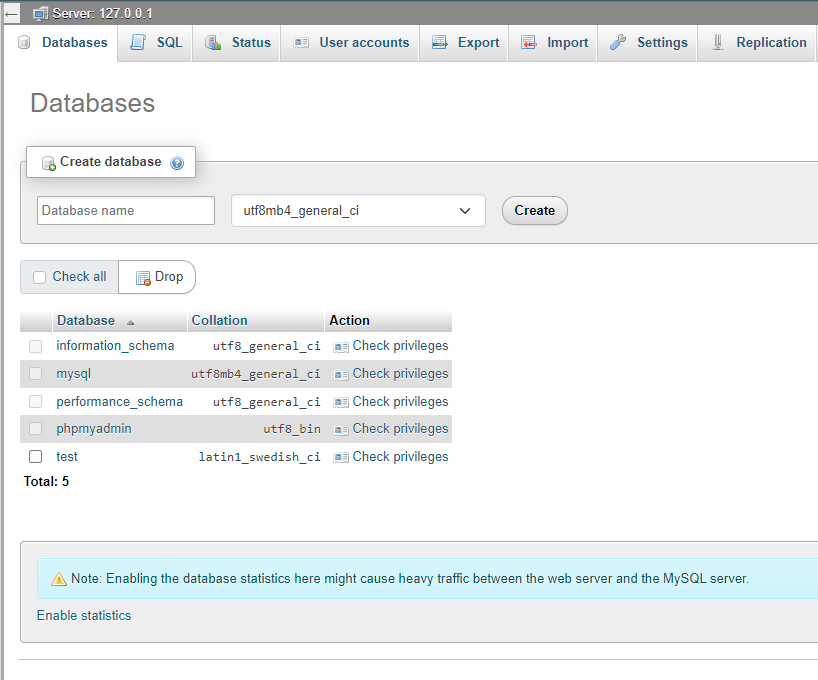
In the label “Database name” you need to write the database name for your WordPress website, we recommend to use a descriptive name, as you may have more than one website and this will help you in the future to maintain the databases, also you are not allowed to use spaces in your database name, the spaces need to be replaced by “_” underscore character.
Also, you should select the right encoding for your website, this is crucial if the language your website will be is using special characters, if you will not indicate the correct encoding then you will have strange characters displayed on your website instead the special characters used by the language. In our case I will let as it is, the utfmb4_general_ci.
After you have chosen the database name and the encoding for your locally installed WordPress, you just need to click the Create button, and you are a step further to have a WordPress website running on your computer.
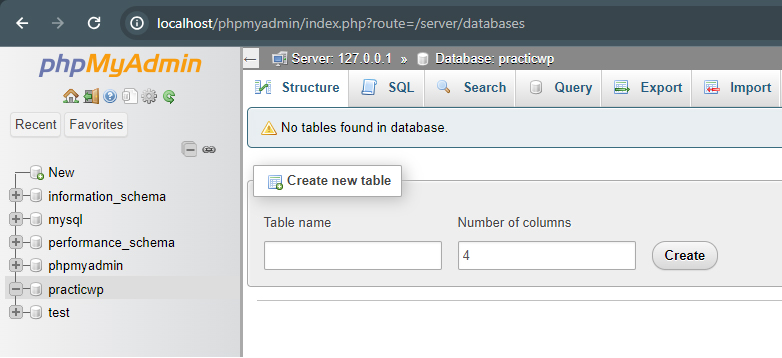
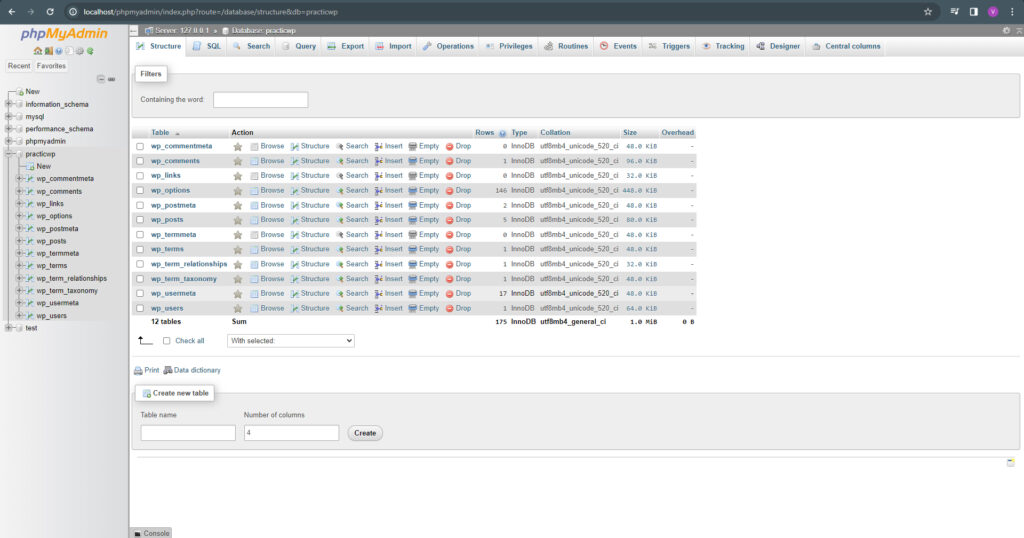
What we obtain is a blank database without any tables, but don’t worry, WordPress will create all the necessary tables.
Downloading the WordPress files
We have the database created, but we do not have the location for WordPress files, like a hosting for our website.
The next step we need to create a folder (with the website name, as this name will be displayed on localhost browser) in the htdocs available in my case at: E:\XAMPP\htdocs\practicwp. (In your case the location you have chosen when we have installed the XAMPP on your computer).
Now, we need to download the WordPress files, that are available here. After the files are downloaded we will unzip the WordPress files in the folder we have created a bit earlier.
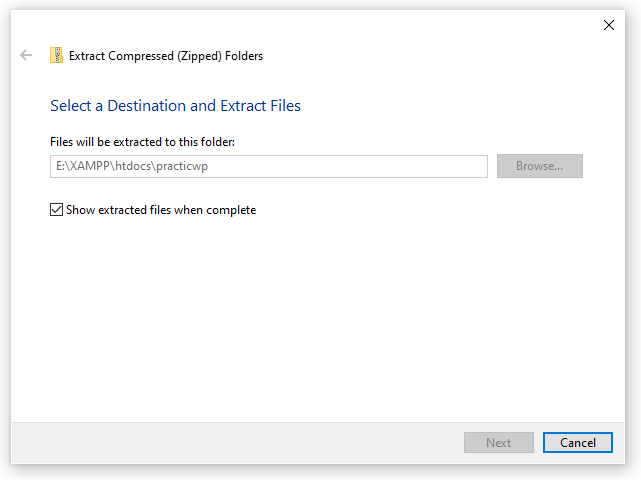
Once the files are unzipped you should have something similar to the screenshot below:
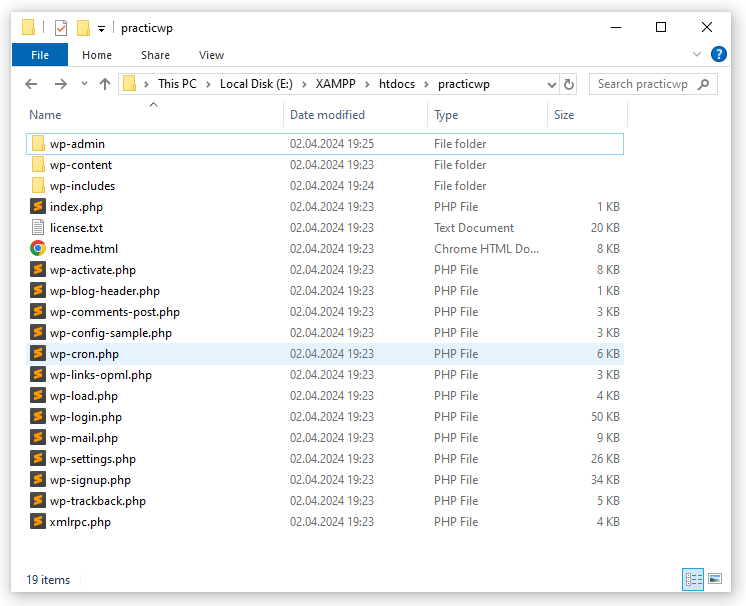
All we need to do is to link the WordPress files with the database created earlier, and the easiest way to do it is by accessing by browser the WordPress files, in this way we will start the WordPress configuration.
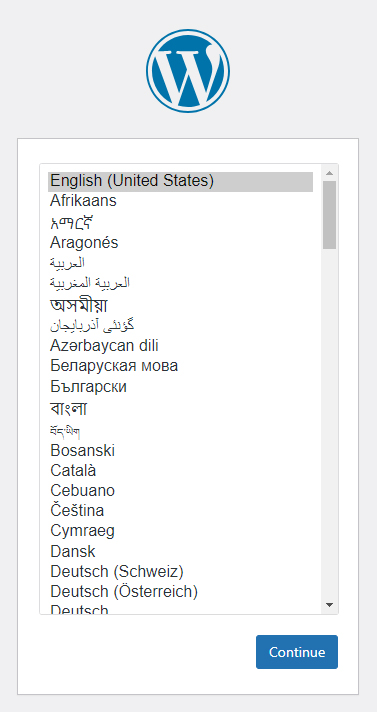
Open a new tab in your browser and type: http://localhost/practicwp (change the practicwp to your website name) and hit Enter button. You will be redirected to a WordPress configuration steps were you will need to select the website language:
After you click the continue button you will see a page with some instructions, and the information you will need to have after you hit the Let’s Go! button.
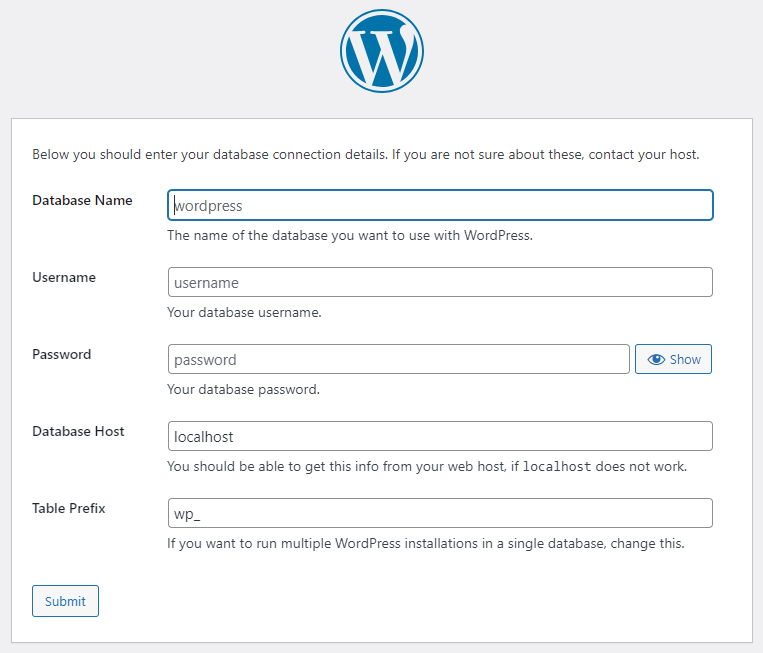
In the empty labels you need to fill in the following information:
- Database Name – the database name you have indicated when we have created a blank database in the phpMyAdmin console;
- Username – is the username for the database, in our case this is root;
- Password – in our case this is blank;
- Database Host – is the localhost;
- Table Prefix – wp_;
If you have filled all the information correctly then after you click the Submit button will see the following message and you need to move forward and left click the Run the installation button.
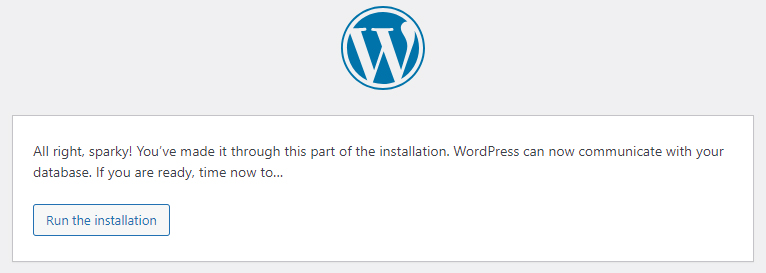
Alright, we have just few more steps to do and some more labels to complete and we will have the WordPress running on our computer.
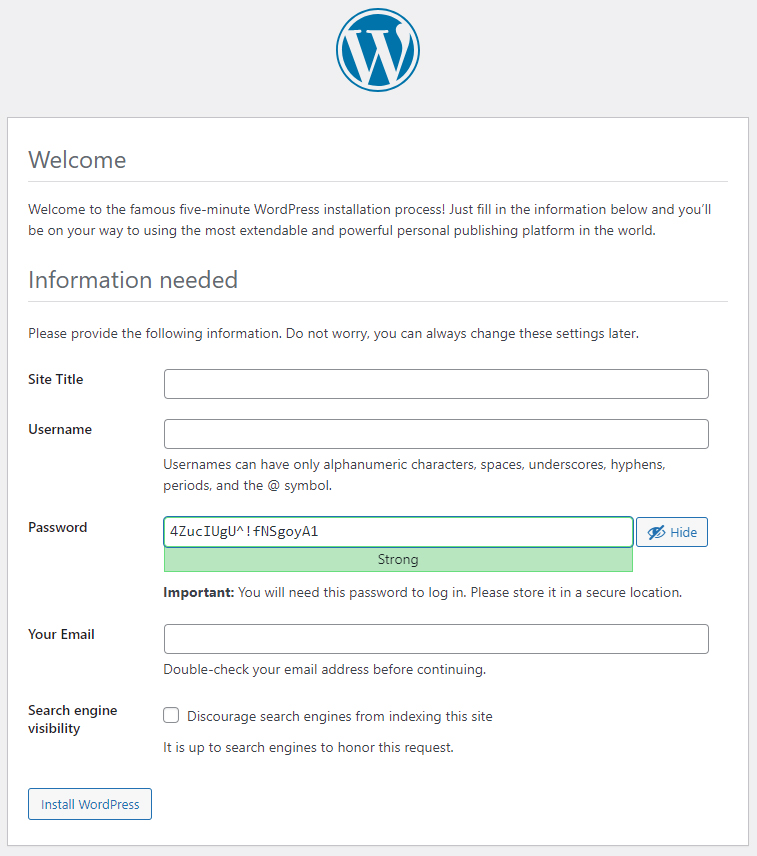
You need to complete the empty labels:
- Site Title – is the website name that will be displayed;
- Username – is the name of your user, you will need the username to fill on the log in page;
- Password – you may change it to something more simple as you will run this WordPress on your computer, or you can memorize the password provided.
and hit the Install WordPress button, if you have done all correctly then you should see the following message.
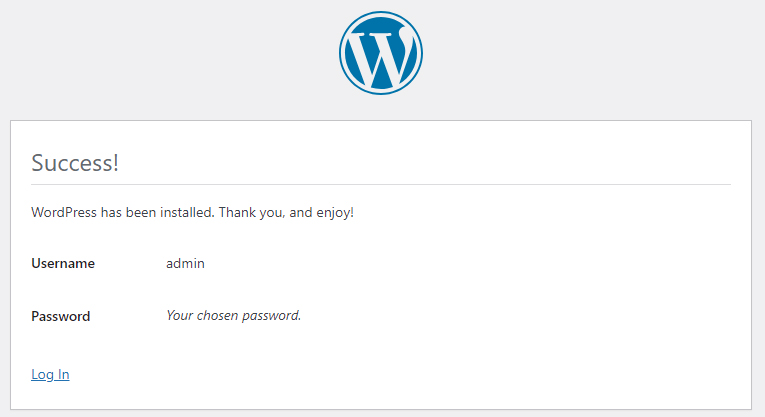
Congratulations! You have completed the WordPress installation process, you can log in accessing the link in the left down corner and fill your username and password.
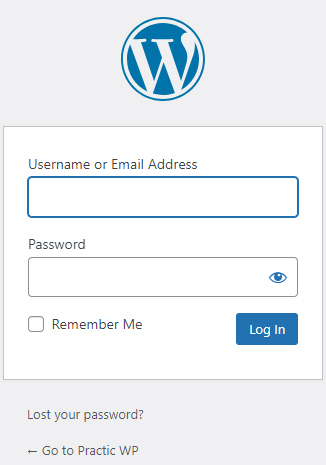
If you log in with your credentials you will have access to the backend of the WordPress website:
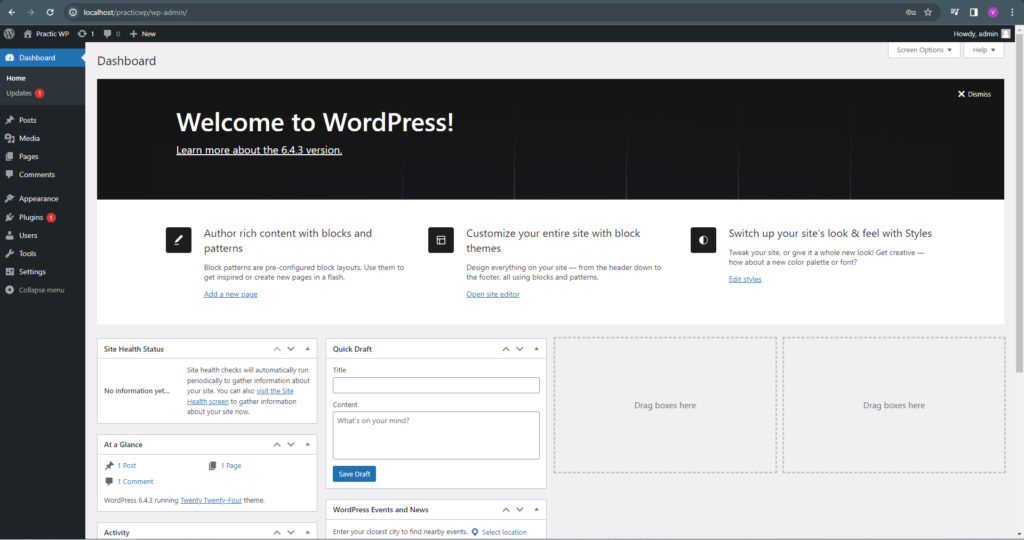
Also, if you remember at the step when we have created the database in phpMyAdmin console, the database was blank, empty, without any tables, but try to access now the phpMyAdmin console and check the database we have created, you should see something like this:
Another way to install the WordPress website
The above method is simple and user friendly with explanation for all the steps you need to take in order to install a WordPress website, but there is also another method.
The second method is also simple one, all you need to do is to change just few rows in a single file and save the file with the name wp-config.php.
In our case, if you will check the folder with WordPress files you will see that the WordPress installation system has already created a new file wp-config.php in which are stored all the data we have filled in earlier. If you will open the file with a text editor (I use Sublime Text code editor) you can see that information we have fill in during the WordPress installation process are available in the file on a specific rows.
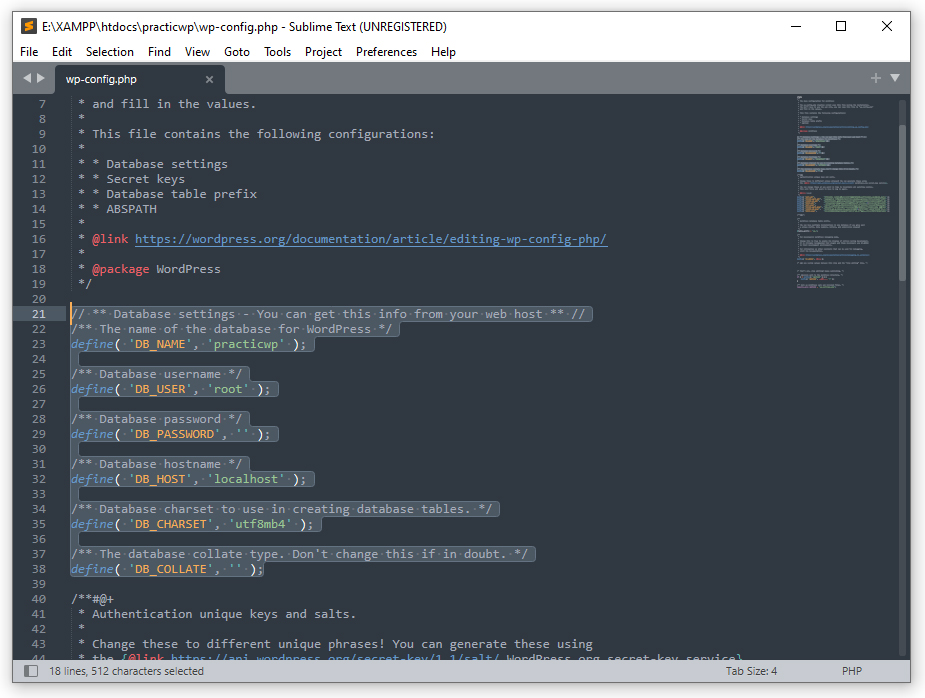
If you will want to install the WordPress with the second method, you just will have to open the wp-config-sample.php file available in the unzipped WordPress files, and fill with the corresponding information the following rows:
// ** Database settings - You can get this info from your web host ** //
/** The name of the database for WordPress */
define( 'DB_NAME', '' );

/** Database username */
define( 'DB_USER', '' );

/** Database password */
define( 'DB_PASSWORD', '' );

/** Database hostname */
define( 'DB_HOST', '' );

/** Database charset to use in creating database tables. */
define( 'DB_CHARSET', 'utf8mb4' );

/** The database collate type. Don't change this if in doubt. */
define( 'DB_COLLATE', '' );
and save the file as wp-config.php and you will be able to access the log in page and the backend of the WordPress website.
Conclusion
We have analyzed the method and steps to follow to install a WordPress website locally on our computer. This article contain just basic information that is quite enough to get a WordPress website installed and running on your computer. If you have questions please write them in the comment section.

