If you want to manage your WordPress website you need to have access to the WordPress Admin Area it is also called a central control panel, the place where you are able to manage different settings of your website.
WordPress Admin Area is also called and known as wp-admin, the backend of WordPress website.
Ways to Log In to Admin Area of a WordPress website
If you have read the article: Default WordPress Installation, you already know that you can log into admin area of your WordPress website by adding /wp-admin at the end of your domain name in your site’s URL, it will be something similar to: “https://yourwebsitename.com/wp-admin“.
Another way to access the WordPress login page is by adding /wp-login.php at the end of your domain name: “https://yourwebsitename.com/wp-login.php” in both cases you will see the following default WordPress login form page.
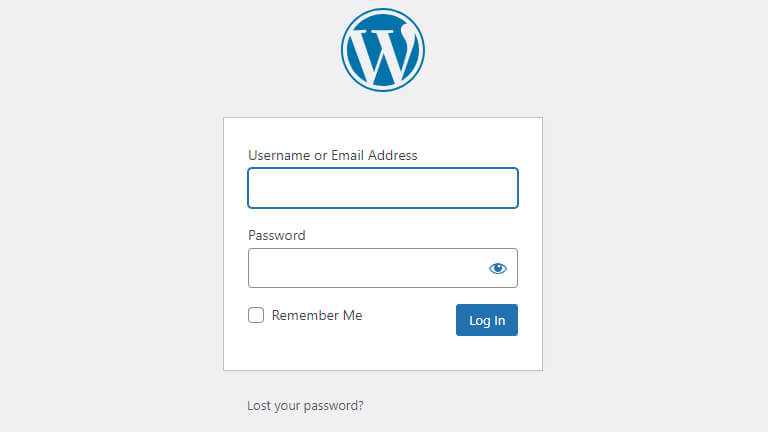
For the security of your website, it is not recommended to use the default login URL on your website, you must change your WordPress login to a custom URL.
Changing the login URL of your website will decrease the number of wrong login attempts on your website and will increase your website security.
However, some websites will need user to have access to the backend of the website, so the link of the login page will be displayed on front end of the website, in this case you will need to have a strong password for your admin user.
What offers WordPress Admin Area for admin users
As you had a successfully logged in, you will be redirected to the Dashboard of admin area, from where you can manage your WordPress website by accessing in a single click to the website settings.
The admin area or the backend of your WordPress website isn’t visible to your website visitors, but it is available for you logged-in users who have an account and have permission to access it, these could be: Subscriber; Contributor; Author; Editor; Administrator.
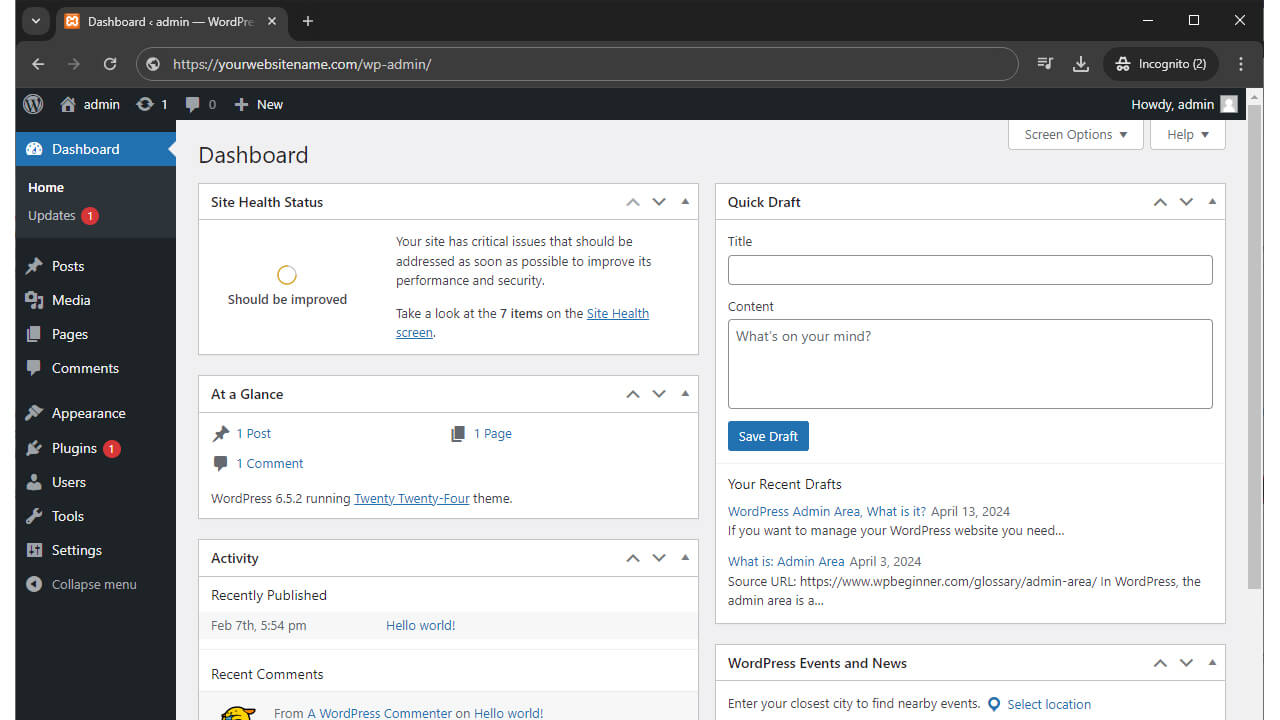
The users mentioned above are available to access the WordPress admin area that has three main sections: the toolbar, admin sidebar, and dashboard.
The toolbar or Admin Toolbar
When you are logged in to the WordPress website, you will see at the top of your screen or Dashboard, a top horizontal black bar – the admin bar.

The Toolbar is offering you some shortcuts to few of the frequently used WordPress features from left to right:
- wordpress.org homepage;
- your website title that is also a shortcut to your website home page;
- updates for your WordPress (themes, plugins) if there are some updates it will be displayed the number on the right;
- the number of comments that is also a shortcut to the comments moderation page;
- a hover dropdown button, that can create, by a single click, a new post, media, page or user;
- your username and link to your profile and to lock out;
The above list can be continued, or if you install some WordPress plugins there could add some additional icons in the admin toolbar of your website.
The admin sidebar
The sidebar situated on the left of your screen is called sidebar or admin sidebar. The role of it is to display the navigation menu through your WordPress website settings providing links to administration screen of every setting available on your website.
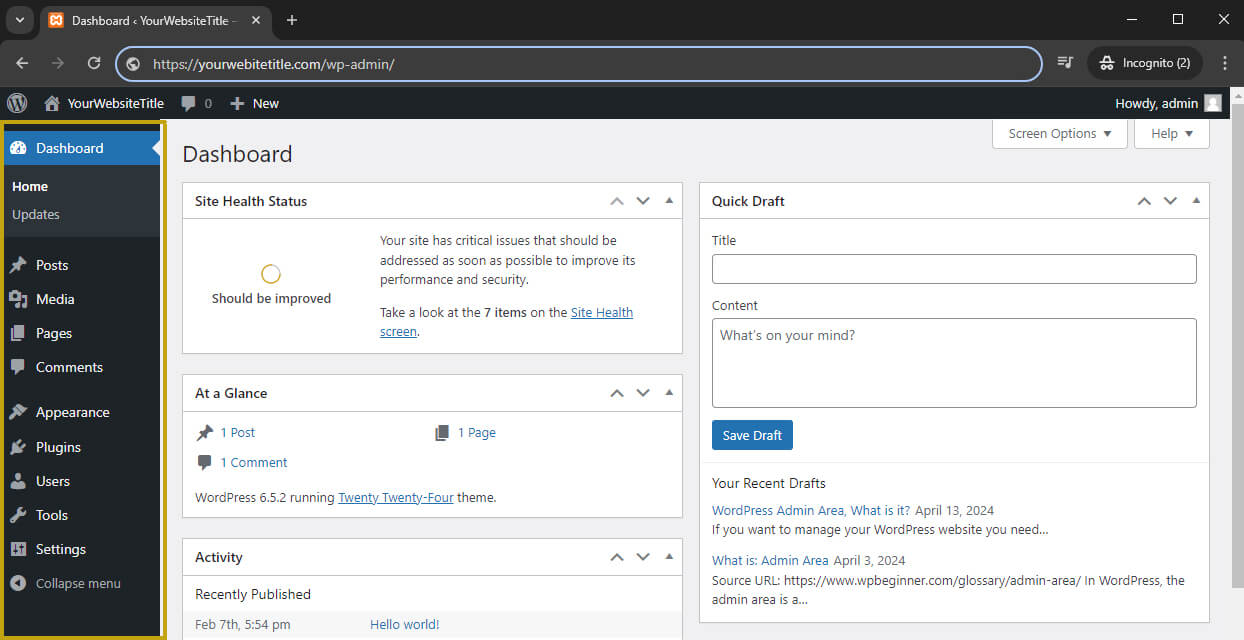
The sidebar is displaying the icon and the name of items menu, but if you click on the bottom button “Collapse menu” the sidebar will be smaller displaying only the icons of the items menu.
If a item menu has subitems then on mouse hover they will be displayed in a right-fly-out submenu, but if you already on the page of a item or subitem menu, then all the submenu will be displayed below the main item menu.
If you have a fresh WordPress website installed, you will see that the admin sidebar will include the standard menu items:
- “Dashboard” the main screen which is displayed when you access the WordPress admin area;
- “Posts” is where you add, edit, publish, or delete articles.
- “Media” or the WordPress Media Library where you upload, view, search, edit, and manage media files;
- “Pages” is where you add view, create, and manage website pages;
- “Comments” is where you can see, manage and moderate the comments left by your visitors;
- “Appearance” the place where you can add, change or delete themes and manage menus and widgets;
- “Plugins” the place where you can install, activate or delete apps that extend your website’s capabilities;
- “Users” is where you add, view, edit, manage and define user roles on your site;
- “Tools” is where you import and export website content, check the website health and manage personal data, edit your themes of plugins files;
- “Settings” is a menu item where you configure your most of your site’s basic settings.
The Dashboard
The first page you see when you access your WordPress admin area is the Dashboard, the large space in the center of the screen.
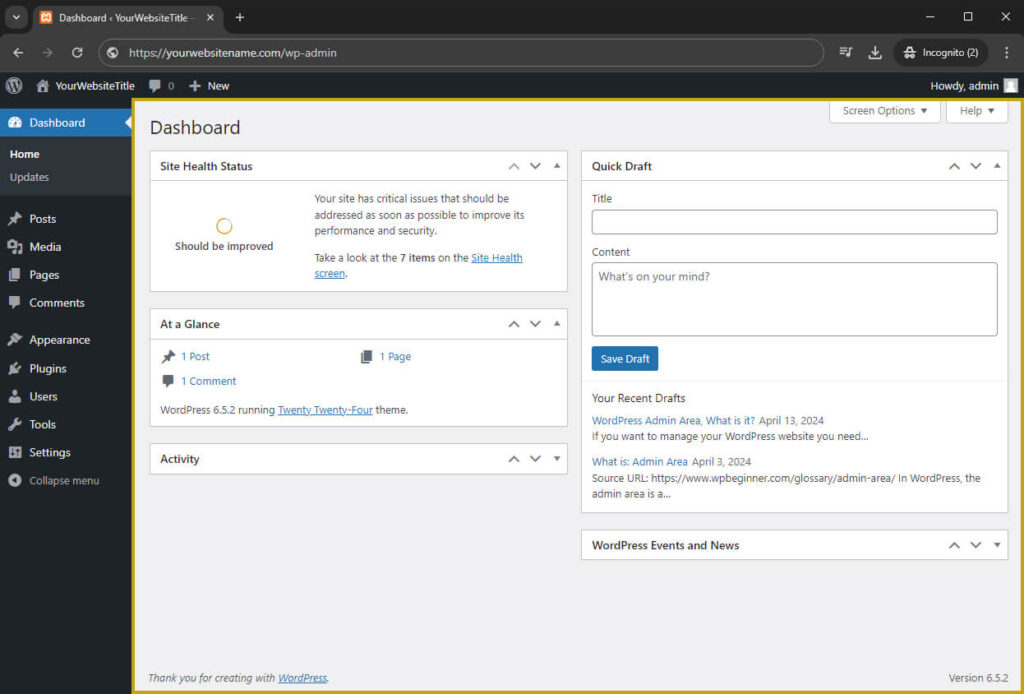
The Dashboard admin area is giving you a quick overview of what is happening on your website. You are able to see the total number of published posts, pages and comments on your website, recent activity on your website, site health status and much more.
On a default WordPress installation, WordPress delivers five widgets on the dashboard:
- “At a glance” widget that provides a summary of the number of posts, pages, and comments on your site as well as your current theme and WordPress version.
- “Activity” widget shows the recently published posts, and the most recent comments on your posts–and allows you to moderate them.
- “Quick Draft” this widget allow you to quickly and easily write a new draft of a post.
- “WordPress Events and News” the widget that provides links to the latest WordPress projects and upcoming WordPress events in your area.
- “Welcome” the widget shows links for some of the most common tasks when setting up a new site or in case you have installed a new version of WordPress the new features and changes that have been added, changed upgraded.
The list of widgets can be extended if you install a theme or plugin that have Dashboard widgets, but you can also add your own widget with a specific function, this is a bit complicated actions and need to create a plugin or to add some code to the “functions.php” file of your theme. If you are interested how to add a Dashboard widget you can read the article here.
Also, you can choose which widgets to be displayed on your dashboard, by clicking the Screen Options tab located in the upper right of dashboard area, where you will see the options to activate or deactivate the widget display.

In case you don’t like the order of the widgets displayed on your Dashboard screen, you can also arrange them using the drag and drop feature.

