Creating a shop website with WordPress is a great choice due to its flexibility and the availability of plugins like WooCommerce, and other that can increase your e-commerce website functionality, which in the final can turn your WordPress site into a great fully online store. In this article we will offer 11 simple steps to create a Shopping WordPress site, those steps are mandatory to follow if you want to have a great, good looking and functional web store. Here’s a step-by-step guide to help you get started:
Step 1: Choose a domain name and web hosting
Before you can start building your website, you’ll need to choose a domain name and a web hosting provider. Domain name is the web address of your site, but hosting is the place where the site lives, and keeps all it’s files.
Choosing a domain name and web hosting for your WooCommerce website is a crucial step in setting up your online store. Here’s some tips that will help to choose a domain name and web hosting.

Some Tips for choosing a Domain Name:
- Keep it relevant: Choose a domain name that reflects your business or the products you sell. It should be easy to remember and relevant to your brand.
- Keep it simple and easy to spell: Avoid using complicated words or spellings that might confuse visitors. A simple, easy-to-spell domain name is more memorable and easier to type.
- Use keywords: If possible, include relevant keywords in your domain name. This can help improve your website’s search engine rankings and make it easier for potential customers to find you.
- Consider the extension: While .com is the most popular domain extension, other extensions like .net, .org, or country-specific extensions (.co.uk, .de, etc.) can also work depending on your target audience and the availability of your desired domain name.
- Check availability: Use a domain registration service to check if your desired domain name is available. If it’s not available, you may need to consider alternative options or variations. You can check if the domain name is available via name.com. But you can have a local domain name websites to search on.
- Avoid trademark issues: Make sure your chosen domain name doesn’t infringe on any trademarks or copyrights. Check the trademark databases to ensure your domain name is legally available for use.

Tips for Choosing Web Hosting:
- Consider your budget: Determine how much you’re willing to spend on web hosting. There are various hosting options available, ranging from shared hosting (budget-friendly) to dedicated servers (more expensive).
- Look for reliability and performance: Choose a hosting provider known for reliability and fast loading times. Read reviews and look for uptime guarantees to ensure your website stays online and performs well.
- Check for scalability: Consider your future growth plans and choose a hosting provider that can accommodate your needs as your business grows. Look for options to easily upgrade your hosting plan if necessary.
- Evaluate security features: Security is crucial for an e-commerce website. Make sure your hosting provider offers features like SSL certificates, regular backups, and malware scanning to keep your website and customers’ data secure.
- Check for WooCommerce compatibility: If you’re planning to use WooCommerce, make sure your hosting provider supports it and offers optimized hosting for WordPress and WooCommerce websites.
- Look for customer support: Choose a hosting provider with responsive customer support available 24/7. This ensures that you can quickly resolve any technical issues that may arise.
- Consider additional features: Depending on your needs, you may want to look for hosting providers that offer additional features like website builders, email hosting, or marketing tools.
There are many hosting providers available, such as Bluehost, SiteGround, HostGator, or DigitalOcean, but it is up to you the hosting provider, we can just recommend the best ones from our point of view.
Once you’ve chosen a domain name and web hosting provider, you can proceed with registering your domain name and setting up your hosting account. Many hosting providers offer domain registration as part of their hosting packages, making it convenient to manage everything in one place.
Step 2: Install WordPress

WordPress is popular with his 5 minutes installation process also, most of web hosting providers offer a simple, one-click installation process for WordPress. The hosting providers recommended in the previous step have a WordPress Hosting plans, and they offer a service tailored for users aiming to build and manage a WordPress website efficiently.
Choosing a hosting plan is up to you, also if you choose to install WordPress by yourself, remember that WordPress is a less than 5 minutes installation process, you can see all the steps of installing the WordPress in our recent article: Default WordPress Installation.
Once WordPress is installed, you can access your website’s dashboard and proceed to the next step.
Step 3: Select a WordPress theme
Choosing a WordPress theme is more complicated that it seems, the theme needs to be compatible with WooCommerce and suits the style of your future shop website. You can find free and premium themes on the WordPress theme directory or on third-party theme marketplaces like themeforest.net.

Here are few tips you could use while choosing a WordPress theme for your website:
- Compatibility with WooCommerce: Ensure that the theme you choose is specifically designed to work with WooCommerce. This ensures seamless integration and optimal performance of your online store.
- Design and Layout: Look for a theme with a design and layout that aligns with your brand identity and the type of products you’re selling. Consider factors such as color schemes, typography, and overall aesthetics.
- Responsive Design: Choose a theme that is mobile-responsive, meaning it adjusts smoothly to different screen sizes and devices. With the increasing use of smartphones and tablets for online shopping, a mobile-friendly theme is essential for providing a positive user experience.
- Customization Options: Opt for a theme that offers a high degree of customization options. This allows you to personalize your website to match your brand and make necessary adjustments without the need for coding knowledge.
- Page Builder Compatibility: If you prefer to create custom layouts and designs for your website pages, consider choosing a theme that is compatible with popular page builder plugins like Elementor, Beaver Builder, or WPBakery Page Builder. This gives you greater flexibility in designing your online store.
- Speed and Performance: Ensure that the theme is lightweight and optimized for speed and performance. A fast-loading website is essential for providing a smooth user experience and improving search engine rankings.
- SEO-Friendly: Choose a theme that is built with SEO best practices in mind. Look for features such as clean code, structured data markup, and support for SEO plugins like Yoast SEO or Rank Math.
- Support and Documentation: Check if the theme developer provides adequate support and documentation. This includes tutorials, FAQs, forums, and direct support channels in case you encounter any issues or need assistance with theme customization.
- Reviews and Ratings: Take the time to read reviews and ratings of the theme from other users. This can provide valuable insights into the theme’s quality, reliability, and compatibility with WooCommerce.
- Updates and Compatibility: Ensure that the theme is regularly updated and compatible with the latest versions of WordPress and WooCommerce. This helps to maintain security, fix bugs, and ensure compatibility with new features and plugins.
- Demo Content: Some themes come with demo content that allows you to quickly set up your website with pre-designed layouts and templates. Consider whether the theme provides demo content that suits your needs and makes the setup process easier.
By considering these factors and thoroughly researching your options, you can choose a WordPress theme that not only looks great but also provides the functionality and features necessary for a successful WooCommerce website.
Step 4: Install WooCommerce
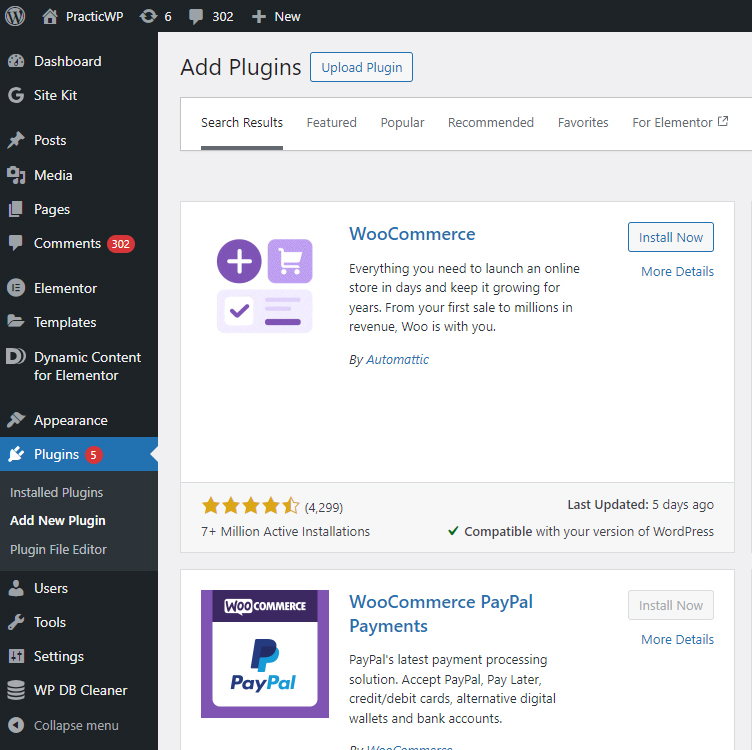
WooCommerce is a open-source ecommerce platform for WordPress that is working on more than four million online stores. WooCommerce is built and supported by Woo, along with contributions from a global community of developers, it is a free WordPress plugin that adds e-commerce functionality to your website. You can install it directly from the WordPress dashboard by going to Plugins > Add New and searching for “WooCommerce”. Once installed, follow the setup wizard to configure your shop, including payment and shipping options.

Step 5: Configure store settings
WooCommerce offers a range of settings to customize your store. You can configure settings related to taxes, shipping, payments, inventory management, and more. Exploring the WooCommerce settings menu in your WordPress dashboard to set up your store according to your preferences will make you to better understand all available settings and set them up, but most of the settings are available when you install the WooCommerce plugin via setup wizard. Also, all the settings could be rewrite or set up later if when you follow the wizard steps do not know what to write in the settings.
So, to have a better understanding of the information you will need when install the WooCommerce plugin you can watch the short video below where you will be able to see all the steps that a setup wizard is asking you, so you could be prepared when you will decide to set up the WooCommerce on your website.
Step 6: Grow your store by adding products
With WooCommerce installed, you can start adding products to your shop. All you need to do is just to go to Products > Add New in your WordPress dashboard to create product listings. Be sure to include product images, descriptions, prices, and any other relevant information.
You have to know that WooCommerce offers you the possibility to create more types of products, like:
- Simple:
- Virtual
- Downloadable
- Grouped
- External/Affiliate
- Variable
In the video below you will find the presentation of all available WooCommerce products.
Step 7: Customize your website
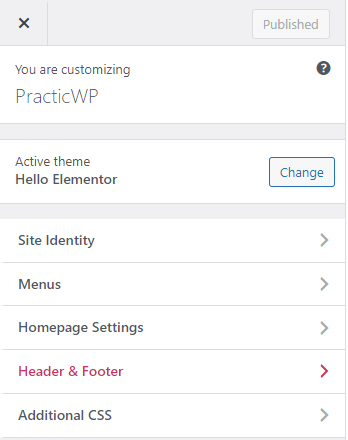
Use WordPress’s customization options to personalize your website’s appearance. You can customize colors, fonts, layouts, and more using the WordPress Customizer. Many WordPress themes also offer additional customization options through their own settings panels.

Step 8: Set up additional pages
Create pages such as an About Us page, Contact page, and any other necessary pages for your website. You need to take into the consideration the fact that if your website will be available for European Union members countries, you will need to respect the GDPR regulation. So your website will need to have several pages like: Terms & Conditions, Terms of Use, Privacy Policy, Cookie Policy, GDPR. You can do this by going to Pages > Add New in your WordPress dashboard.
Step 9: Optimize for SEO
To improve your shop’s visibility in search engine results, optimize your website for search engines. Install an SEO plugin like Yoast SEO, Rank Math, AIOSEO and SEOPress to help you optimize your product pages and other content for relevant keywords. All these plugins have free and pro version.
Step 10: Test your WordPress store
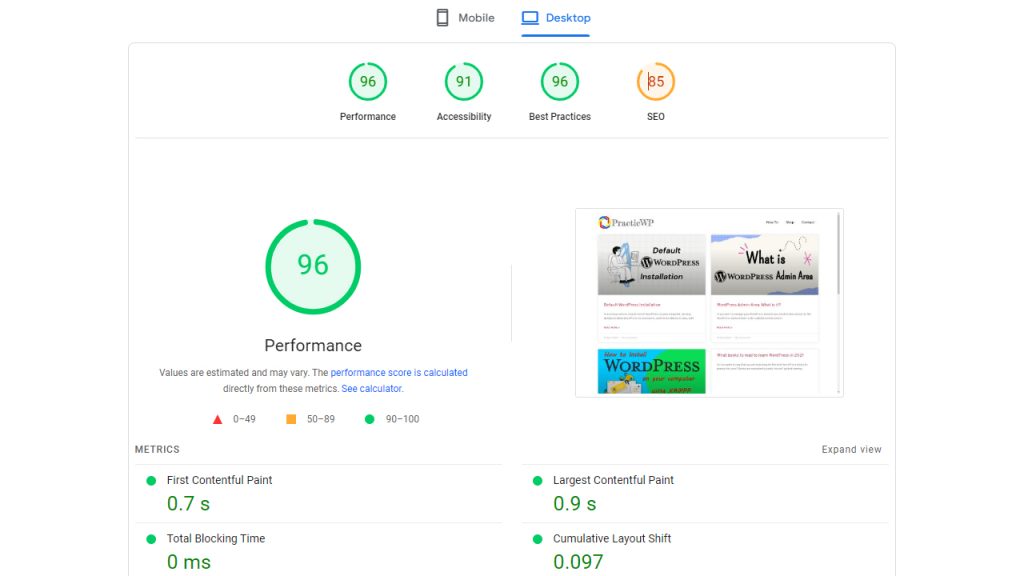
Before launching your shop, thoroughly test your website to ensure everything is working correctly and properly. Test the purchasing process, payments, check for any broken links or errors, and make sure your website is mobile-responsive. In our days many users are using their mobile phones to buy items online. Also, it is recommended to check how fast is your website loading, you can check this with GTmetrix, Pingdom Website Speed Test or PageSpeed Insights. All those website tools will analyze your website loading speed and will offer some recommendation to improve the loading speed.

However, if you want a full report, some of the website will offer you to create an account.
Step 11: Launch your website
Once you’re satisfied with your online shop and you have tested everything thoroughly, then it’s time to launch your website and store! Announce your shop launch on social media and other marketing channels to start attracting customers, you may also use promotions via Facebook, Instagram, google ads TikTok, Pinterest and other available recourses.
Keep in mind that building a successful online shop takes time and effort, and you may not be able to sell a product in the first day or maybe first week, but you will need to follow your dream and maintain your online shop daily. Continuously update your website with new products, optimize your marketing strategies, and provide excellent customer service to grow your online business.
Congratulations !!! You have now the knowledge to create an online web store based on WooCommerce! Now make your first steps and use your knowledge for real, create your own shop and let us know in the comments if this article was useful for you!!!


